Are you looking to install a new residential 240V water heater but don’t know where to start with the wiring? Don’t worry, we’ve got you covered with a simple and easy-to-follow wiring diagram that will have your water heater up and running in no time!
Before we dive into the wiring diagram, it’s important to note that working with electricity can be dangerous, so if you’re not comfortable with electrical work, it’s best to hire a professional to do the job for you.

Related Post Ezgo Gas Golf Cart Wiring Diagram
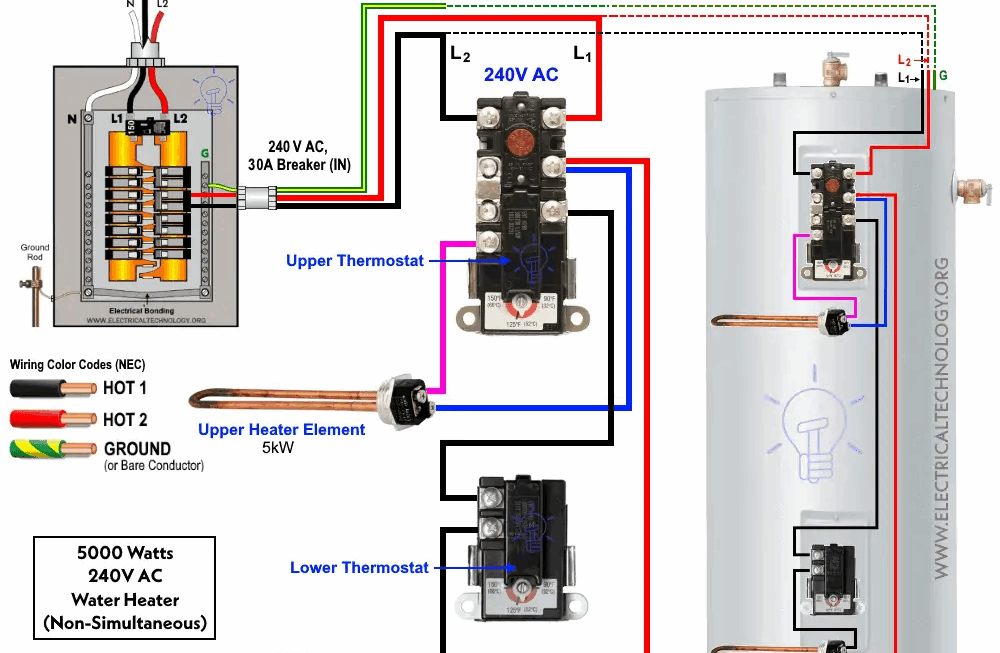
Start by connecting the black wire from the circuit breaker to the black wire on the water heater. Use a wire nut to secure the connection and wrap it with electrical tape for added protection. Repeat this step with the white wires and then the ground wires.
Once all the wires are securely connected, double-check your work to make sure everything is properly insulated and there are no loose connections. Once you’re confident in your work, you can turn the power back on at the breaker box and test your water heater to ensure it’s working correctly.
And there you have it, a simple and straightforward wiring diagram for your residential 240V water heater. By following these steps and taking the proper safety precautions, you can have your new water heater up and running in no time. If you have any questions or run into any issues, don’t hesitate to reach out to a professional for help.
Now that you have the know-how to wire your residential 240V water heater, you can enjoy hot water whenever you need it without any hassle. Remember to always prioritize safety when working with electricity and never hesitate to ask for help if you’re unsure about anything. Happy wiring!
Download and Print Residential 240V Water Heater Wiring Diagram Listed below