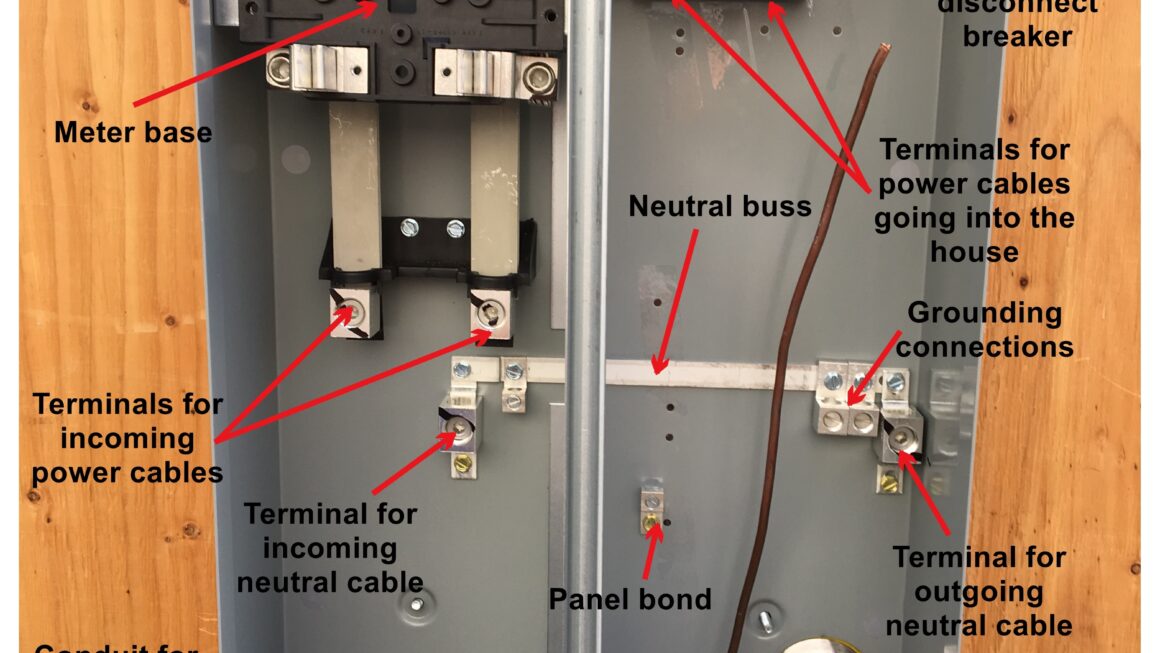
Electric meter boxes are an essential part of any residential property, allowing you to monitor your electricity usage and ensure accurate billing. However, understanding how to wire a residential electric meter box can be daunting for those who are not familiar with electrical systems.
Whether you are a homeowner looking to do some DIY electrical work or a professional electrician seeking guidance, having a clear wiring diagram is crucial. By following a residential electric meter box wiring diagram, you can ensure that the installation is done correctly and safely.

Related Post Pr380 Fan Relay Wiring Diagram
Next, identify the connection points for the meter box, which are typically located near the main panel. You will need to connect the incoming power lines to the appropriate terminals in the meter box, following the wiring diagram carefully to ensure proper installation.
It is important to use the correct gauge of wire and ensure that all connections are secure to prevent any electrical issues down the line. Once the wiring is complete, you can turn the power back on and test the meter box to ensure that everything is functioning correctly.
If you are unsure about any part of the wiring process, it is always best to consult with a professional electrician to avoid any potential hazards. They can provide expert guidance and ensure that the installation is done safely and up to code.
In conclusion, understanding how to wire a residential electric meter box is essential for ensuring the safe and efficient operation of your electrical system. By following a clear wiring diagram and taking necessary precautions, you can successfully install a meter box in your home.
Download and Print Residential Electric Meter Box Wiring Diagram Listed below