Looking to upgrade your golf cart with a new wiring diagram? If you have a 36 volt EZ Go golf cart, then you’re in luck! By following a schematic wiring diagram, you can easily make the necessary changes to your cart.
Whether you’re a DIY enthusiast or just want to save some money on repairs, having a good understanding of the wiring diagram is essential. It can help you troubleshoot any electrical issues and make upgrades to your cart without any hassle.

Related Post 48V Club Car Battery Wiring Diagram 48 Volt
Next, carefully study the wiring diagram to identify the different components and their connections. This will help you determine the best way to make any necessary changes or upgrades to the wiring system in your cart.
When making any changes to the wiring system, always make sure to follow the color-coding and labeling on the diagram. This will ensure that you connect the right wires to the right components and prevent any potential electrical issues down the line.
Once you have made the necessary changes, it’s important to test the electrical system to ensure everything is working correctly. Take your cart for a test drive to see if the upgrades have improved its performance and functionality.
By following a schematic 36 volt EZ Go golf cart wiring diagram, you can easily make upgrades and repairs to your cart without any hassle. Just remember to take your time, follow the diagram carefully, and test the system before hitting the golf course!
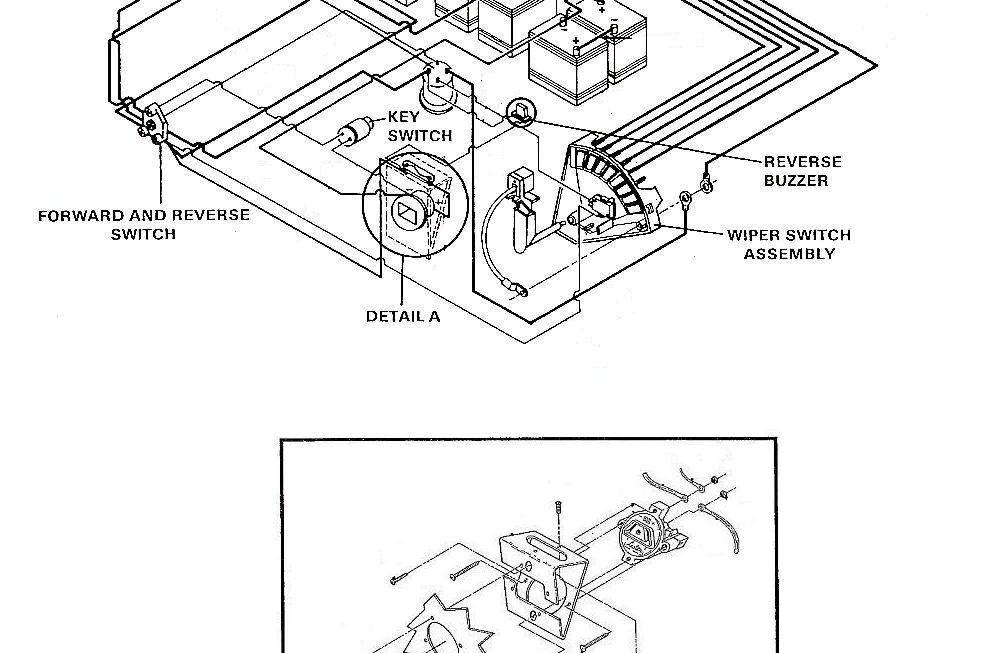
Download and Print Schematic 36 Volt Ez Go Golf Cart Wiring Diagram Listed below