Are you looking to wire a 12 volt fuel gauge in your boat but not sure where to start? Understanding how to properly connect the sender unit can make all the difference in accurately monitoring your fuel levels while out on the water.
By following a simple wiring diagram, you can ensure that your fuel gauge is working correctly and providing you with the information you need to navigate safely. Let’s dive into the process of wiring a sender unit 12 volt fuel gauge for your boat.

Related Post Pats Bypass Module Wiring Diagram
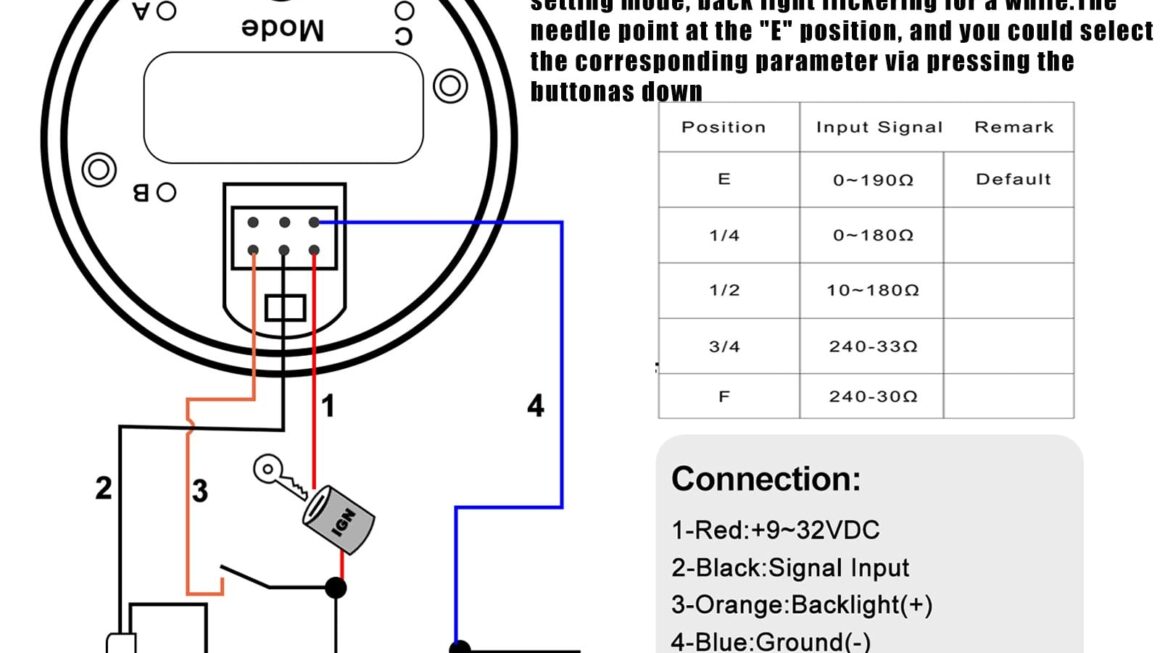
Next, refer to the wiring diagram provided by the manufacturer of your fuel gauge. This diagram will outline the specific connections that need to be made between the sender unit, fuel gauge, and power source. Make sure to follow the diagram carefully to avoid any errors.
When connecting the wires, it’s essential to use the appropriate tools and materials to ensure a secure connection. Double-check that all connections are tight and secure before powering up your fuel gauge. Testing the gauge after wiring is complete will help you determine if everything is functioning correctly.
Once you have successfully wired the sender unit 12 volt fuel gauge in your boat, you can enjoy the peace of mind that comes with knowing your fuel levels are accurately monitored. Regularly checking your gauge and maintaining your fuel system will help prevent any unexpected issues while out on the water.
In conclusion, wiring a sender unit 12 volt fuel gauge for your boat doesn’t have to be a daunting task. By following a wiring diagram and taking the time to make secure connections, you can ensure that your fuel gauge is working correctly. Stay safe on the water by keeping an eye on your fuel levels with a properly wired fuel gauge.
Download and Print Sender Unit 12 Volt Fuel Gauge Wiring Diagram For Boat Listed below