If you’re looking to understand how to wire a Chevy 350 starter, you’re in the right place. This simple guide will walk you through the process step by step.
Whether you’re a beginner or just need a refresher, this article will help you navigate the world of starter wiring with ease.

Related Post Leviton 3 Way Lighted Switch Wiring Diagram
Start by disconnecting the negative terminal of the battery to ensure safety during the wiring process. This step is crucial to avoid any accidents or electrical issues.
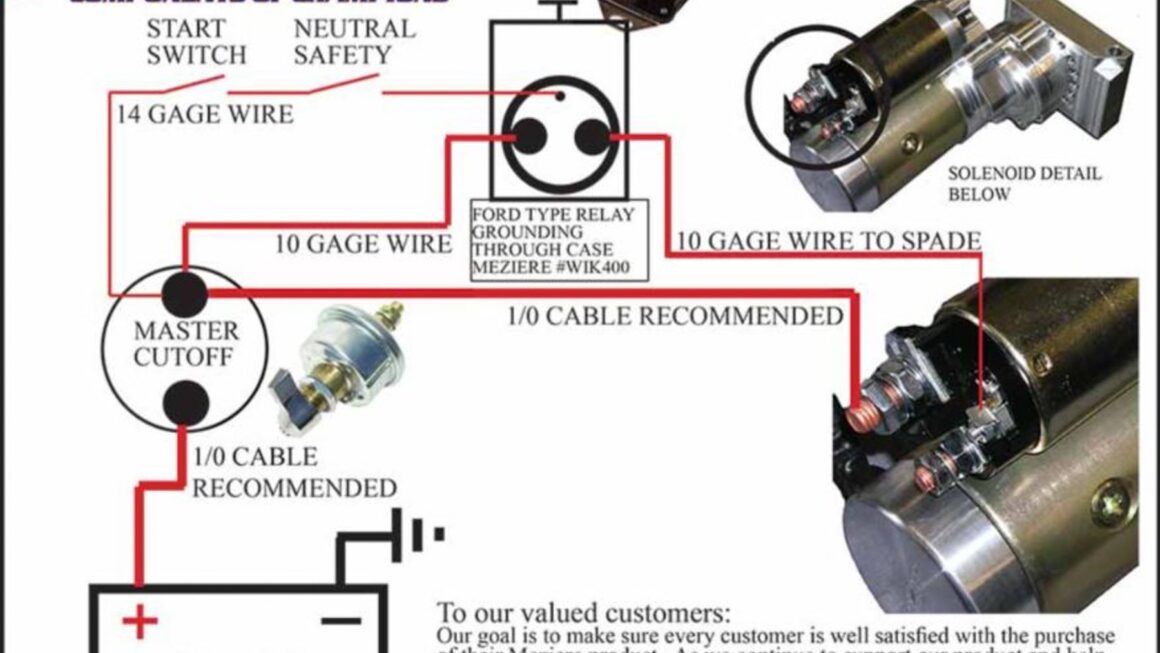
Next, locate the starter solenoid on your Chevy 350 engine. It’s usually mounted on the passenger side of the engine block and has a small wire attached to it. This wire is crucial for the starter operation.
Now, it’s time to connect the wiring. Attach the positive battery cable to the large terminal on the starter solenoid. Then, connect the small wire to the “S” terminal on the solenoid.
Once all the connections are secure, double-check everything before reattaching the negative battery terminal. This final step ensures that your Chevy 350 starter is properly wired and ready to go.
In conclusion, wiring a Chevy 350 starter doesn’t have to be complicated. With this simple guide, you can tackle the task with confidence and get your engine up and running in no time. Remember to follow the steps carefully and prioritize safety throughout the process.
Download and Print Simple Chevy 350 Starter Wiring Diagram Listed below