If you’re looking for a simple dodge alternator wiring diagram, you’ve come to the right place. Understanding how to wire your alternator can save you time and money, and ensure your vehicle runs smoothly.
Whether you’re a seasoned mechanic or a DIY enthusiast, having a clear wiring diagram can make all the difference. Let’s dive into the basics of dodge alternator wiring and simplify the process for you.

Related Post 3 Wire Starter Wiring Diagram
Next, you’ll need to locate the wiring harness that connects your alternator to the battery and other electrical components in your vehicle. This harness typically consists of several wires of different colors, each serving a specific purpose.
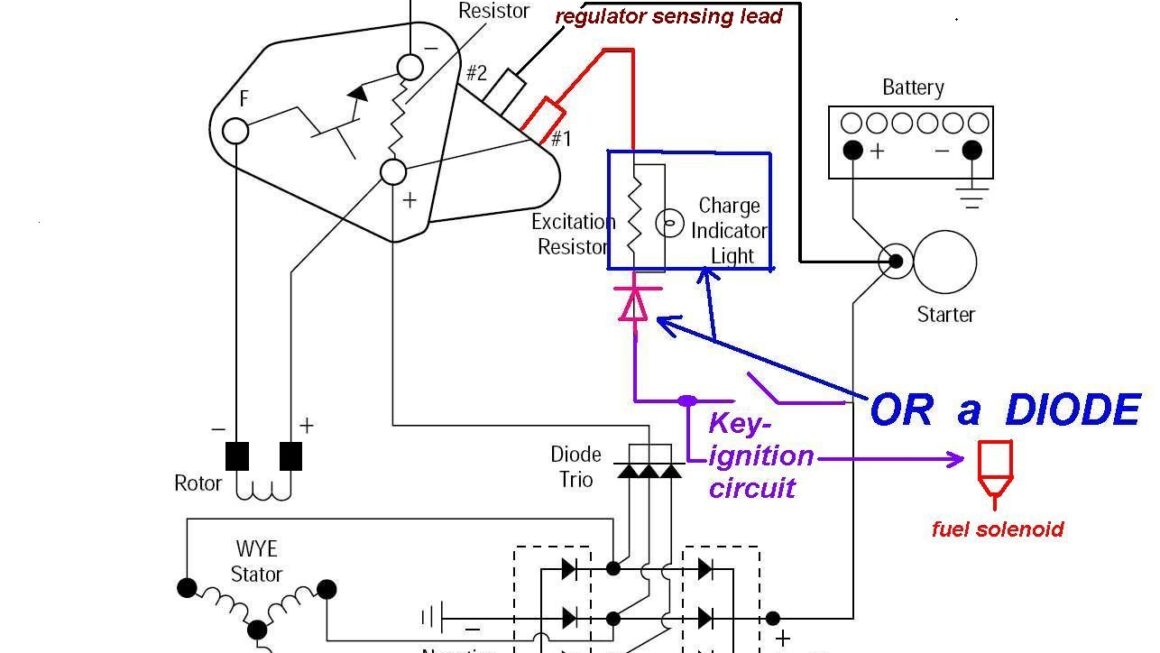
Referencing a dodge alternator wiring diagram can help you determine which wires go where and avoid any potential confusion. Make sure to follow the diagram carefully and double-check your connections before powering up your vehicle.
Once you’ve completed the wiring process, it’s essential to test your alternator to ensure everything is functioning correctly. Use a multimeter to check the voltage output and confirm that your alternator is charging your battery as it should.
In conclusion, having a simple dodge alternator wiring diagram can make a world of difference when it comes to maintaining and troubleshooting your vehicle’s electrical system. By following the diagram closely and taking the time to understand the process, you can ensure your alternator works efficiently and keeps your vehicle running smoothly.
Download and Print Simple Dodge Alternator Wiring Diagram Listed below