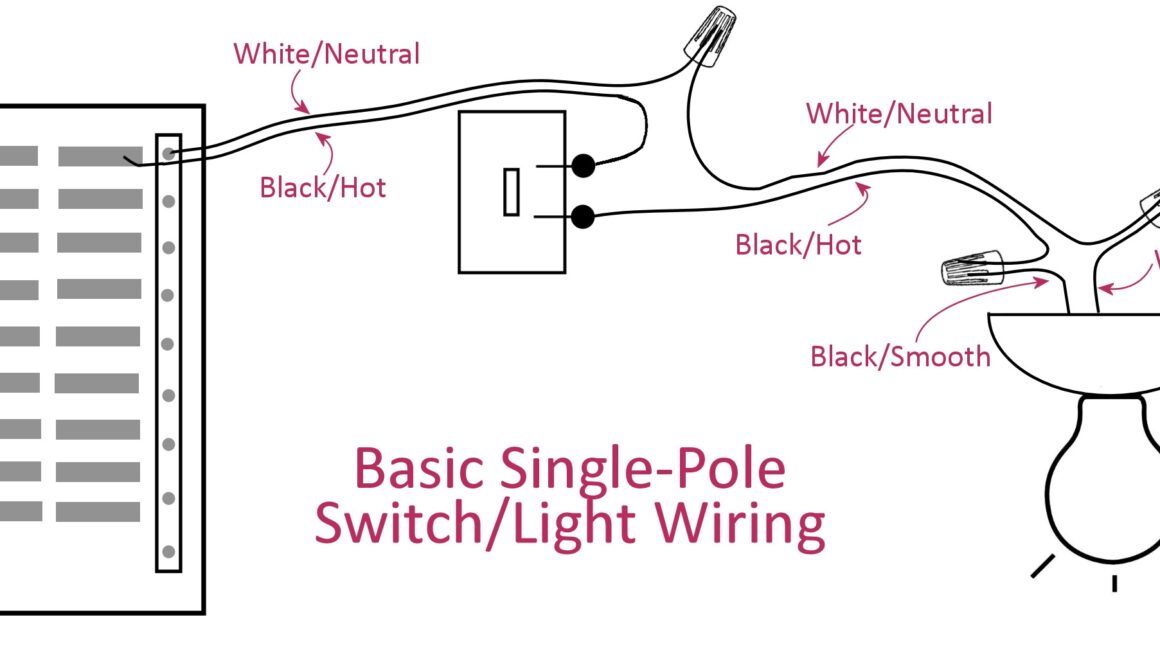
If you’re looking to install a new light switch in your home, you might be wondering how to wire it up. Luckily, with a simple light switch wiring diagram, the process can be a breeze!
Understanding how to wire a light switch is essential for any homeowner. Whether you’re replacing an old switch or installing a new one, having a basic understanding of electrical wiring can save you time and money in the long run.

Related Post Trailer Plug Wiring Diagram 7 Way
Next, you’ll need to identify the hot wire, which is typically black or red, the neutral wire, which is white, and the ground wire, which is usually green or bare copper. Using a voltage tester, double-check that the power is off before proceeding.
Once you’ve identified the wires, it’s time to connect them to the new light switch. The hot wire should be connected to the brass-colored screw, the neutral wire to the silver-colored screw, and the ground wire to the green screw. Make sure to tighten the screws securely to ensure a proper connection.
After connecting the wires, carefully tuck them back into the electrical box and secure the light switch in place with the screws provided. Once everything is in place, you can turn the power back on at the breaker box and test the switch to make sure it’s working properly.
With a simple light switch wiring diagram and a little know-how, you can easily install a new light switch in your home. Just remember to always prioritize safety and double-check your work before turning the power back on. Happy wiring!
Download and Print Simple Light Switch Wiring Diagram Listed below