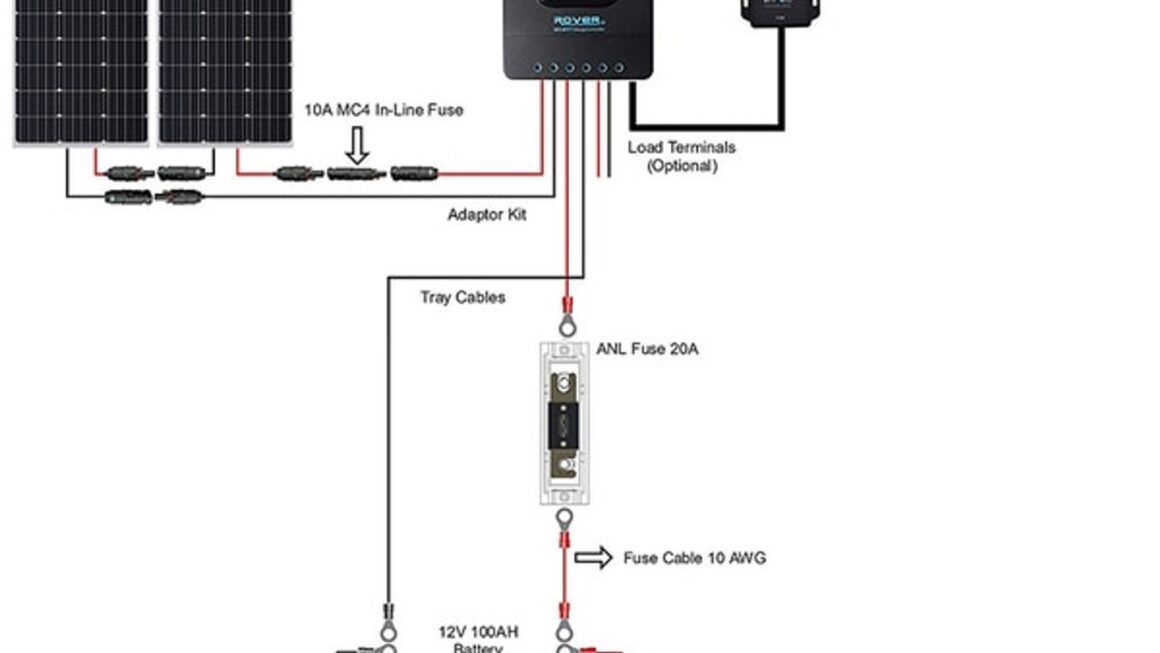
If you’re looking to set up solar power in your RV, understanding the wiring diagram is crucial. With the right setup, you can harness the power of the sun to keep your RV running smoothly while off-grid.
Having a solar wiring diagram for your RV will help you visualize how everything connects and ensure that your system is set up correctly. It can be overwhelming at first, but with some guidance, you’ll be able to tackle this project with confidence.

Related Post 12 Volt Winch Solenoid Wiring Diagram
Next, you’ll need to design your solar wiring diagram. This will involve mapping out how each component connects to the next, including the solar panels, charge controller, batteries, and inverter. It’s essential to follow the diagram precisely to ensure everything functions correctly.
As you start the installation process, take your time and double-check each connection to avoid any mistakes. It’s also a good idea to label each wire and component to make troubleshooting easier down the line.
Once everything is connected according to the wiring diagram, you can test your system to ensure it’s working properly. Monitor the voltage and current to make sure everything is charging as it should. With a successful setup, you can enjoy the benefits of solar power on your RV adventures.
In conclusion, having a solid understanding of the solar wiring diagram for your RV is essential for a successful installation. By following the diagram carefully and taking your time during the setup process, you can enjoy the freedom and sustainability that solar power provides on the road.
Download and Print Solar Wiring Diagram For Rv Listed below