When it comes to winter snow removal, having a reliable Western snow plow solenoid wiring diagram is essential. Whether you’re a seasoned pro or just starting out, understanding how to properly wire your snow plow solenoid can save you time and frustration in the long run.
With the right wiring diagram, you can easily troubleshoot any issues that may arise and ensure that your snow plow is always ready to tackle the toughest storms. In this article, we’ll walk you through the basics of Western snow plow solenoid wiring and provide you with the information you need to get the job done right.

Related Post 1979 Chevy Camaro Starter Wiring Diagram Pdf
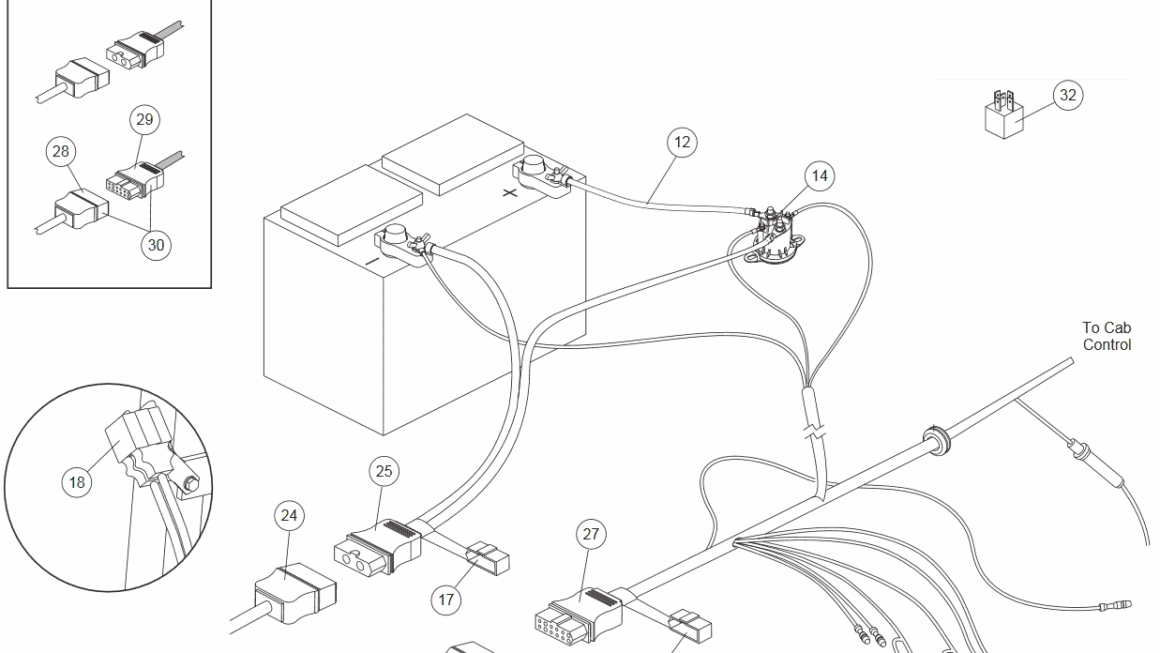
Start by carefully studying the wiring diagram to familiarize yourself with the different components and connections. Identify the solenoid and its corresponding wires, as well as the battery and control switch connections. Follow the diagram closely to ensure that each wire is properly connected to its designated terminal.
Once you’ve completed the wiring process, double-check all connections to make sure everything is secure and properly insulated. Test the solenoid by activating the control switch and observing the plow’s movement. If everything is working as it should, you’re ready to hit the road and tackle the next snowstorm with confidence.
Remember, proper maintenance and care of your Western snow plow solenoid will help prolong its lifespan and ensure reliable performance season after season. By following the manufacturer’s guidelines and using a quality wiring diagram, you can keep your snow plow in top condition and ready for whatever Mother Nature throws your way.
So there you have it – a beginner’s guide to Western snow plow solenoid wiring. With the right tools, knowledge, and a little bit of patience, you can tackle this essential task with ease. Stay safe out there, and happy plowing!
Download and Print Western Snow Plow Solenoid Wiring Diagram Listed below