If you’re looking for a wiring diagram for your Emerson thermostat, you’ve come to the right place. Understanding how to properly wire your thermostat is essential for ensuring that your heating and cooling systems work efficiently.
Whether you’re replacing an old thermostat or installing a new one, having the correct wiring diagram is crucial. Emerson thermostats are known for their reliability and ease of use, making them a popular choice for homeowners.

Related Post 8N Ford Tractor Wiring Diagram
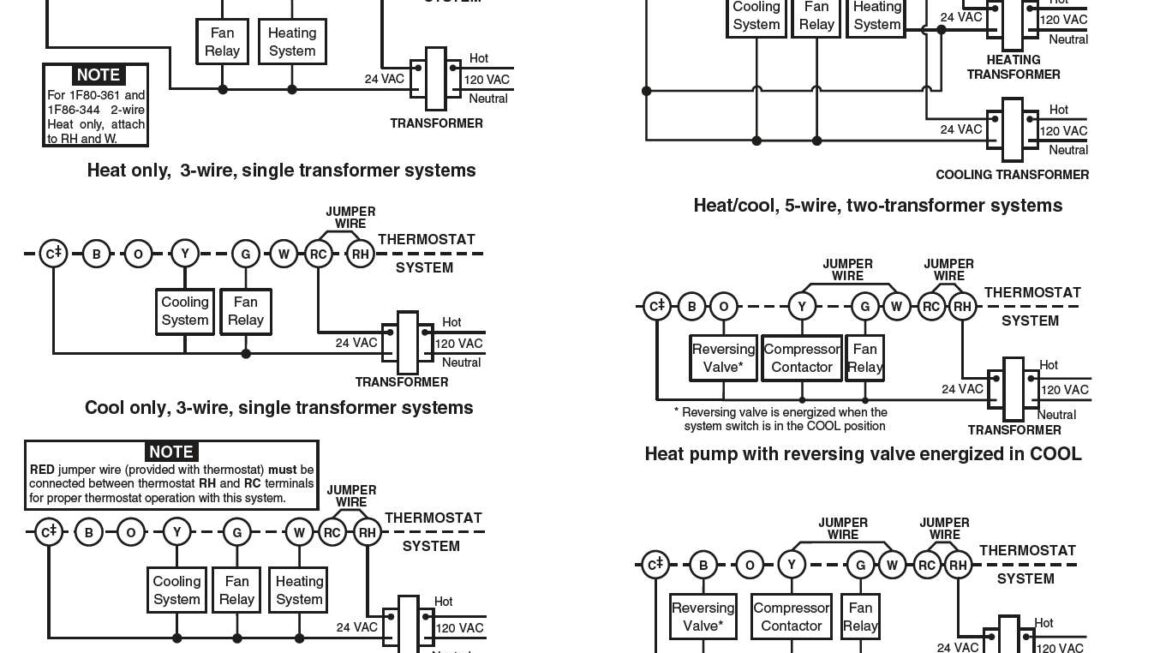
Each wire from your HVAC system serves a specific function, such as controlling the heating or cooling system. Refer to the wiring diagram provided with your Emerson thermostat to ensure that each wire is connected to the correct terminal on the thermostat.
Typically, Emerson thermostats will have labels on the terminals indicating where each wire should be connected. For example, the “R” terminal is usually for the power wire, while the “W” terminal is for the heating system. Following the wiring diagram will help you avoid any errors during the installation process.
Once you have connected all the wires to the correct terminals on your Emerson thermostat, securely mount it to the wall and restore power to your HVAC system. You can then program your thermostat to your desired settings and enjoy a comfortable indoor environment.
If you’re unsure about any part of the wiring process or need assistance, don’t hesitate to consult the user manual that came with your Emerson thermostat. You can also reach out to customer support for guidance to ensure a successful installation.
In conclusion, having the right wiring diagram for your Emerson thermostat is essential for a smooth and trouble-free installation. By following the provided instructions and double-checking your connections, you can enjoy the benefits of a properly functioning thermostat in your home.
Download and Print Wiring Diagram For Emerson Thermostat Listed below