If you’re looking for a simple and easy way to understand how to wire an air ride pressure switch, you’ve come to the right place. In this article, we’ll break down the process step by step so you can tackle this project with confidence.
Whether you’re a seasoned DIY enthusiast or just getting started with automotive electrical work, knowing how to wire an air ride pressure switch is a valuable skill to have. With the right guidance, you can successfully complete this task and ensure your air ride system is functioning properly.

Related Post Wiring Diagram For 8N Ford Tractor
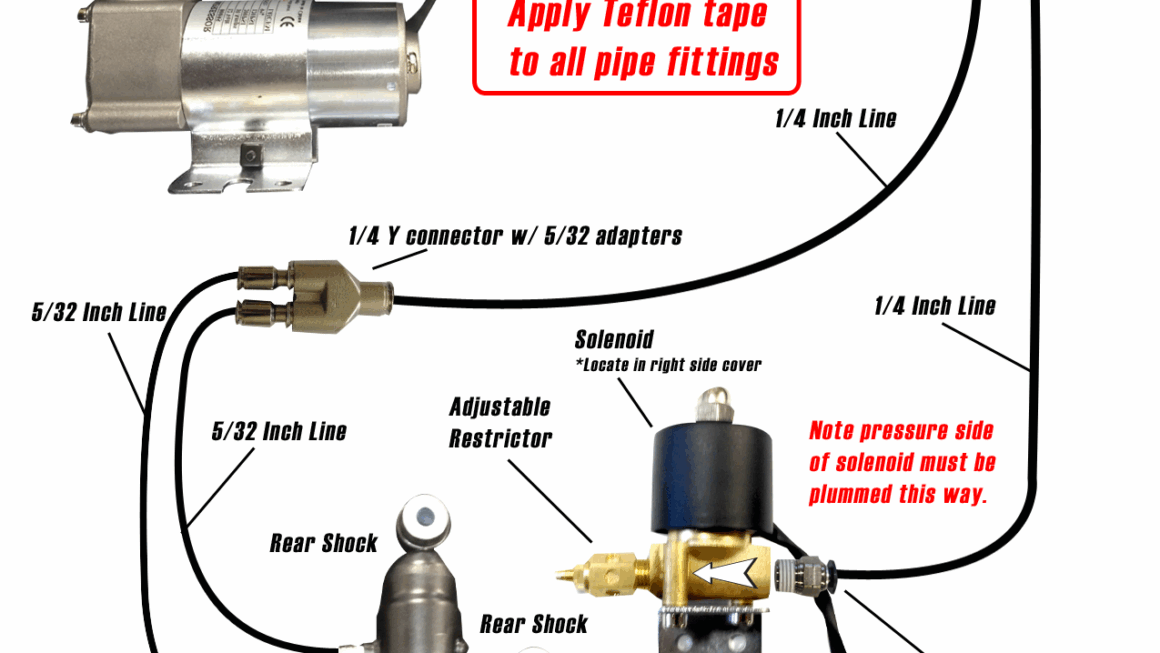
Start by identifying the power source and ground wires. These are essential for powering the pressure switch and ensuring it functions correctly. Make sure to connect these wires securely to the corresponding terminals on the switch to avoid any electrical issues down the line.
Next, locate the wires that will connect the pressure switch to the air compressor and air tank. These wires are crucial for regulating the air pressure in the system and maintaining optimal performance. Follow the diagram carefully to ensure these connections are made accurately.
Once you’ve completed the wiring process, double-check all connections to ensure they are secure and properly insulated. Testing the system before finalizing the installation is also recommended to make sure everything is working as intended. With a bit of patience and attention to detail, you’ll have your air ride pressure switch wired up and ready to go in no time.
In conclusion, understanding how to wire an air ride pressure switch doesn’t have to be complicated. By following a clear diagram and taking the time to make accurate connections, you can successfully complete this task and enjoy a fully functional air ride system. With practice and experience, you’ll become more confident in tackling similar automotive electrical projects in the future.
Download and Print Air Ride Pressure Switch Wiring Diagram Listed below